🚀 Getting Started
To start using the TsuperBot Auto Responder on your Messenger page, follow the simple steps below to grant access and allow deployment.
Please be aware that the Tsuper Bott Facebook Account (used to assign admin access) is different from the Tsuper Bot Facebook Page (used for inquiries and updates).
🔑 You need to:
- 👤 Add the Tsuper Bott Facebook Account to grant admin access
- 📩 Message the Tsuper Bot Facebook Page for any questions or updates
Please send us a friend request to ensure you can easily find our account when assigning page access.
👍 Tsuper Bott Account
Step 1: Go to Your Facebook Page
Open your Facebook page where you want to deploy the bot.

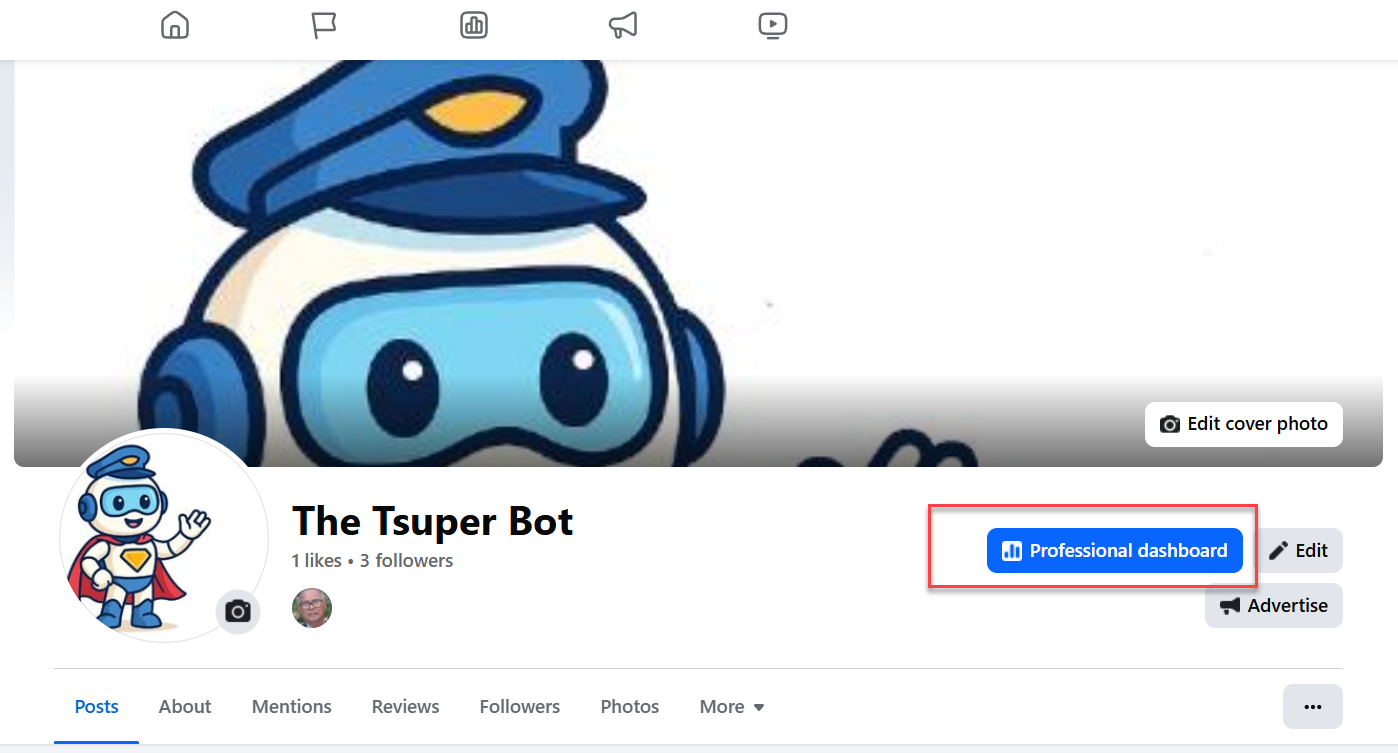
Step 2: Click Professional Dashboard on the Upper Right.
This will take you to the page management section where you can configure roles, settings, and permissions. Look for it in the sidebar after opening your page.
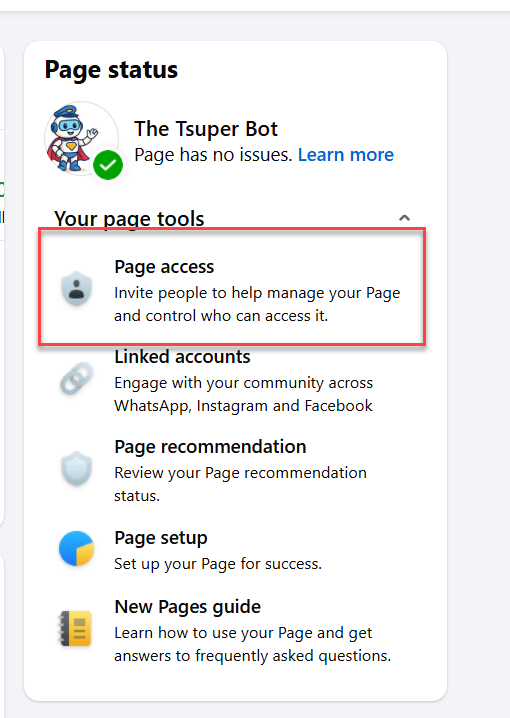
Step 3: Select Page Access
Under Page settings, choose Page Access to manage admin roles.
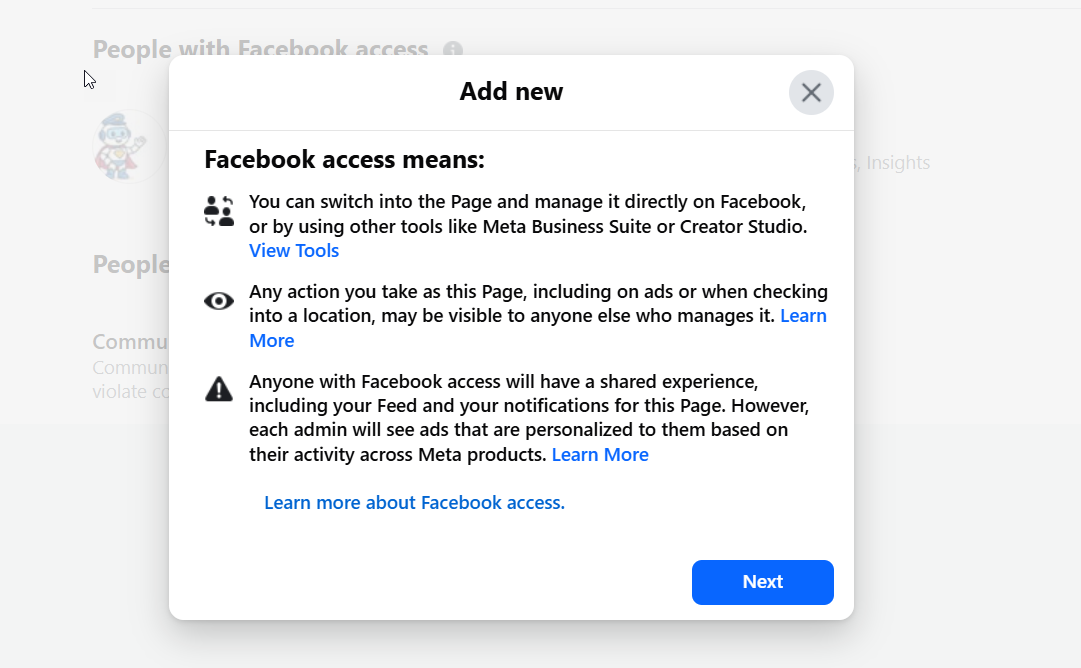
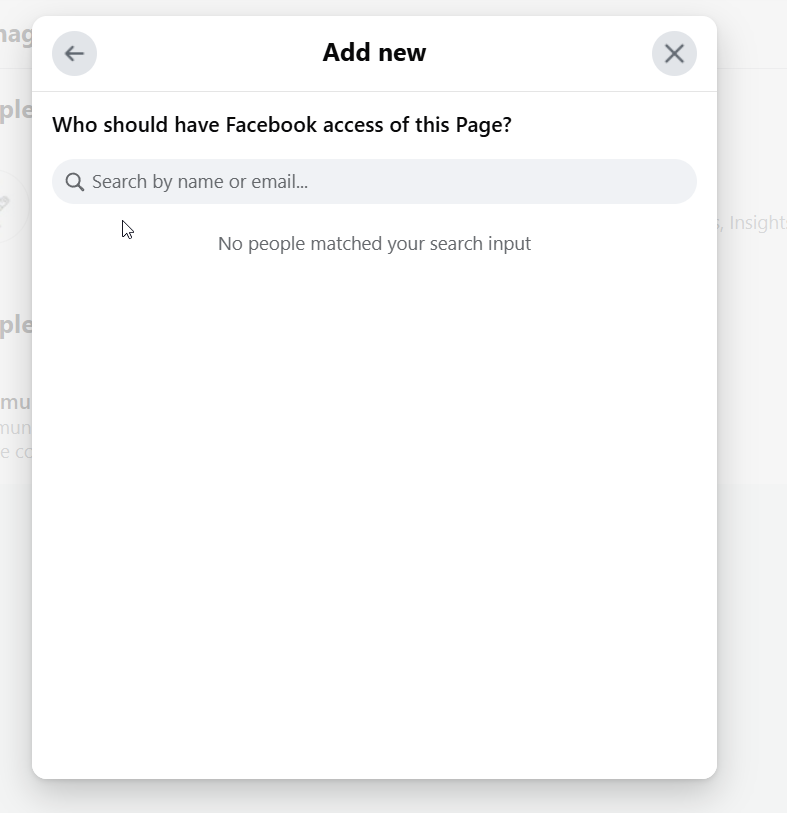
Step 4: Click Add New and Search for Our Page
CLick on add New

Just Click on Next
Search and add our Facebook Account as an admin using this link:
TsuperBot Admin Account
If you can't find our Facebook account when assigning access, please add us as a friend first to ensure visibility.
Step 5: Grant Full Control
Make sure to give full control so the bot can respond, send messages, and process orders correctly.
We're here to help you get started smoothly!